

A quick note: a few links below are affiliate links. Buy through one and we may earn a small commission. It never costs you more, and we only point to gear we'd actually put in front of our own dogs. As an Amazon Associate I earn from qualifying purchases.
Quick answer
If you can hear the nails clicking on the kitchen floor they are already too long. Take off a little at a time and stop as soon as a pale oval appears at the cut end, that is the edge of the quick, and keep styptic powder within reach before you start. A grinder is slower than clippers but far more forgiving on dark nails, and once the dog accepts the routine the whole job takes five minutes.
What this guide covers
- Clippers or a grinder, and why it matters
- Where the quick is, and how not to hit it
- Grooming basics for between vet trips
- Keep styptic powder in reach before you start
- Go slow the first few times, even if it feels silly
- How often is often enough
- The two things the manual is explicit about
- Black nails, where the advice stops being useful
- Why a sore foot gets worse instead of better
- Small comforts while you sort it out
- Frequently asked questions
- Why is my dog licking their paws so much?
- How often should dog nails be trimmed?
- Do dogs need paw protection in winter?
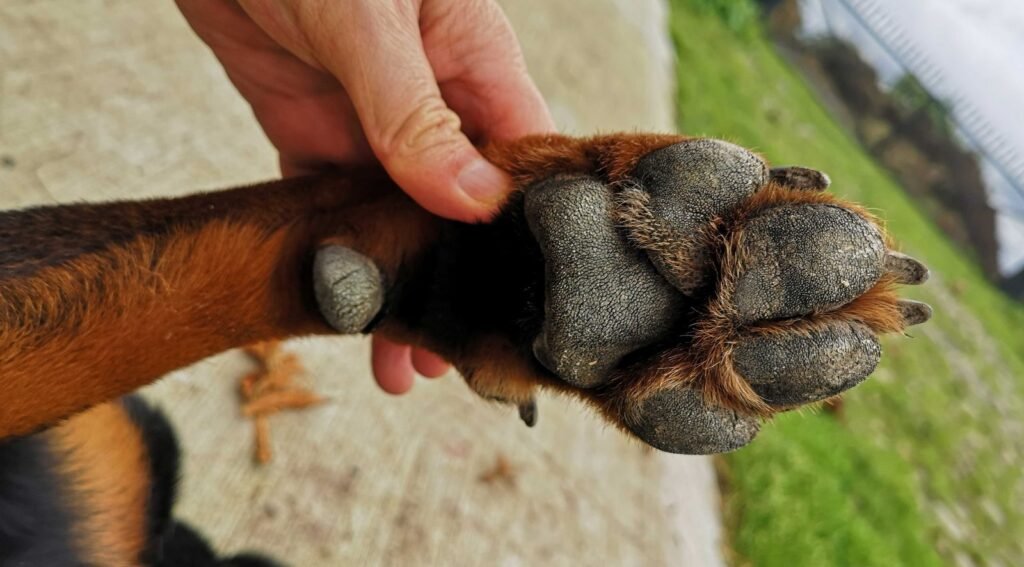
If you can hear your dog’s nails clicking on the kitchen floor, they are already too long. That click means the nail is hitting the ground on every step and pushing back into the toe joint, which over months changes how the dog stands and can make an older dog sore in the wrists. Grooming places charge fifteen to twenty-five dollars for a two-minute trim, and in a city you are often booking a week out for it. Once you learn to do it at home the whole thing takes five minutes and costs nothing after the first tool.
The reason most people do not is fear, and it is a reasonable fear, because cutting the quick hurts the dog and bleeds a surprising amount. But the fix for that is not avoiding the job, it is understanding where the quick is and taking off less than you think you need to.
Clippers or a grinder, and why it matters
There are two tools and they suit different dogs. Scissor-style clippers are fast and quiet, which matters if your dog already hates having its feet touched, but they give you no margin, one squeeze and it is done. A rotary grinder files the nail down instead of cutting it, so you take off a little at a time and it is much harder to hit the quick, but it makes a whirring noise and gets warm, and some dogs bolt at the sound. If your dog has thick nails or you are nervous, start with a quiet electric dog nail grinder. If your dog is calm and you want speed, a solid pair of nail clippers with a safety guard does the job in under a minute.
Check the quiet electric dog nail grinder price on Amazon
Where the quick is, and how not to hit it
The quick is the pink strip of blood vessel and nerve running down the center of the nail. On a dog with white or clear nails you can see it, a pink line that stops well short of the tip, and you cut a couple of millimeters past where it ends. On a dog with black nails you cannot see it at all, which is where people panic. The trick is to shave off thin slices and look at the cut face each time. Pale and dry means keep going. The moment you see a small dark dot appear in the center of the cut, stop, you are right at the edge of the quick. That dot is your signal every single time, regardless of nail color.
Keep styptic powder in reach before you start
You will nick a quick eventually, everyone does, and a dog nail bleeds far more than the injury deserves. A pinch of styptic powder for dogs pressed against the tip clots it in about fifteen seconds. In a pinch, cornstarch or a bar of plain soap pressed into the nail will slow it down, but the powder is three dollars and worth having in the drawer before you ever pick up the clippers. Do not skip this and start cutting, because bleeding plus a stressed dog plus you scrambling for a fix teaches the dog that nail trims are an emergency.
Go slow the first few times, even if it feels silly
You do not have to do all four feet in one sitting. A dog that has had a bad experience will remember it, so for the first couple of weeks, trim two nails, give a treat, and let them go. Handle the paws on days you are not trimming at all, just hold a foot and give a treat, so touching the feet stops being a warning sign. This is the same patience-first approach that works for a nervous dog in general, and if your dog is genuinely fearful about handling it is worth reading up on helping a fearful dog gain confidence before you push the nail thing.
How often is often enough
For most dogs, every three to four weeks keeps the nails off the floor. Dogs walked daily on city concrete wear the nails down a bit on their own, so they often need less than a suburban dog that walks on grass. The one to watch is the dewclaw, the little nail up on the inside of the leg that never touches the ground and so never wears down, it will curl into the skin if you forget it. Check it every time you trim the rest.
The two things the manual is explicit about
Nail trimming is one of those jobs where advice is plentiful and sources are scarce. The Merck Veterinary Manual has no chapter on how to hold a clipper. It does say two things worth having in front of you before you start.
The first is what you are cutting. “Their toenails have the same structure as human nails but are much thicker, which helps them run and dig.” And on the part that goes wrong: “it’s important not to cut into the ‘quick,’ a blood vessel in the nail that bleeds and is painful to the dog when it’s nicked. The quick is hard to see in dogs that have black nails.”
The second is the nail people forget. “Some dogs also have an extra toe, called a ‘dewclaw,’ a little above the foot on the back of the leg. Dewclaws have no purpose, but they have nails that need to be trimmed just like other nails. Dewclaws can get caught on things and are easily injured, so veterinarians often recommend surgically removing them.”
That last item deserves more attention than it gets, and the reason is simple geometry rather than veterinary science, so take this part as ours. The dewclaw sits above the foot. It never touches pavement. Every other nail on the dog gets filed down a little by every walk, which is why city dogs often need less trimming than the internet assumes, and why the dewclaw is usually the longest nail on the animal by a wide margin. It is also the one that curls back on itself and grows into the skin, because nothing is stopping it. Check it every time, even on the visits where you decide the rest can wait.
Black nails, where the advice stops being useful
Merck states the problem and does not solve it: on a black nail you cannot see the quick. Nothing changes that, so the method has to stop relying on sight.
What we do is take very small slices, one at a time, and read the cut face rather than the outside of the nail. The exposed end starts out chalky and pale. As it gets closer to the quick a small grey or pink centre appears in the middle of that pale disc. That centre is the warning, and it arrives before any blood does. When it shows, that nail is finished for the day.
This is technique, not a citation. The manual does not describe it. But it follows directly from the one thing the manual does say, which is that the quick is a blood vessel inside the nail and that hurting it hurts the dog.
Why a sore foot gets worse instead of better
Here is where the trail of good sources leads somewhere unexpected. Merck writes very little about trimming and a great deal about what happens to the skin between the toes when a foot is not carrying weight the way it should.
The chapter on interdigital furunculosis, the deep sores that form in the webbing, names the loading problem directly: “More pressure also may be put on interdigital spaces in overweight dogs or those with abnormal weight bearing due to lameness or conformation abnormalities.” It adds that breeds with wide paws and more space between the digital pads, naming Labrador Retrievers, English Bulldogs, German Shepherds and Pekingese, “may be more likely to bear weight on the haired skin between the pads.”
Then the loop closes. Licking and other itch-driven behaviour “can contribute to local trauma and development of interdigital furunculosis.” A dog whose foot is uncomfortable licks it, and the licking is itself an injury to the skin.
Be careful with what that does and does not prove. Merck does not name overgrown nails as a cause of these lesions, and neither will we. What the chapter establishes is that a foot bearing weight abnormally is a foot at risk, and that the dog’s own response to discomfort makes the situation worse rather than better. Draw your own line from a nail long enough to change how a dog stands.
One correction from the same chapter, because the wrong word sends people to the wrong advice. These lesions get called interdigital cysts constantly, including by vets in casual conversation. Merck: they “are often incorrectly referred to as interdigital cysts” and “Histologically, these lesions represent areas of nodular pyogranulomatous inflammation” that are “almost never cystic.” Searching for cyst gets you home remedies. Searching for furunculosis gets you the actual condition.
And the point at which trimming stops being the answer: furuncles are usually painful, the dog may be obviously lame on the affected foot, and it will lick and bite at the sore. A dog limping on one foot with a red swollen web between the toes is not a grooming problem. That is a visit, and often a swab, because the treatment depends on what is growing there.
Sources: Merck Veterinary Manual, Description of Dogs and Interdigital Furunculosis in Dogs, both read 31 August 2026. Quoted passages come from those pages; the black-nail method and the remark about dewclaw wear are ours and are flagged as such in the text.
Frequently asked questions
Why is my dog licking their paws so much?
Allergies come first, then irritants picked up on walks. The rust-colored stain on the fur is yeast fed by saliva, which means the licking has been going on for weeks, not days.
How often should dog nails be trimmed?
Every three to four weeks for most dogs. If you hear clicking on a hard floor, they are already long enough to push the toes out of alignment.
Do dogs need paw protection in winter?
In a salted city, yes. Either a balm before the walk or a rinse in lukewarm water after it, because road salt burns the pads and dogs then lick it off.
Google lets you pick which sites come up first in your own results.